Serial Communications with the ATmega168
The first thing you do when you learn a new programming language or platform is to write a “hello world” application. This requires something like a “printf” function. That’s not so straightforward when it comes to microcontrollers – where will the output of the “printf” go? That’s where serial communications come in. Arduino users have it easy – they just need to use Serial.print(). But the situation is not so bad if you are using a standalone microcontroller – just choose a chip like ATmega168 which has USART – hardware support for serial communications.
The code needed to transmit serial data is very simple, and the datasheet has most of what you need:
#define BAUD 9600
#define MYUBRR F_CPU/16/BAUD-1

void USART_Init(unsigned int ubrr)
{
/*Set baud rate */
UBRR0H = (unsigned char)(ubrr>>8);
UBRR0L = (unsigned char)ubrr;
/*Enable receiver and transmitter */
UCSR0B = (1<<RXEN0)|(1<<TXEN0);
/* Set frame format: 8data, 1 stop bit */
UCSR0C = (1<<UCSZ00) | (1 << UCSZ01);
}

void USART_Transmit(unsigned char data )
{
/* Wait for empty transmit buffer */
while ( !( UCSR0A & (1<<UDRE0)) )
;
/* Put data into buffer, sends the data */
UDR0 = data;
}

// write null terminated string
void serial_write_str(const char* str)
{
int len = strlen(str);
int i;
for (i = 0; i < len; i++) {
USART_Transmit(str[i]);
}
}
Here is the schematic of a simple setup that will let you send debug data (strings) from an ATmega168 to your computer. If you are completely new to AVR programming, I recommend that you read Hackaday’s tutorial on the subject. Note how the TX/RX lines are flipped when you connect it from the ATmega168 to the FTDI adapter.
A few things to remember in order to for this to work correctly (the Makefile in the GitHub link below takes care of all this):
- For getting a 9600 baud rate, the chip needs to run at 8 MHz, and for this, you need to unset the CKDIV8 fuse.
- For full sprintf formatting support, some additional flags are needed in the linker.

Here is a photo of the setup that I used:

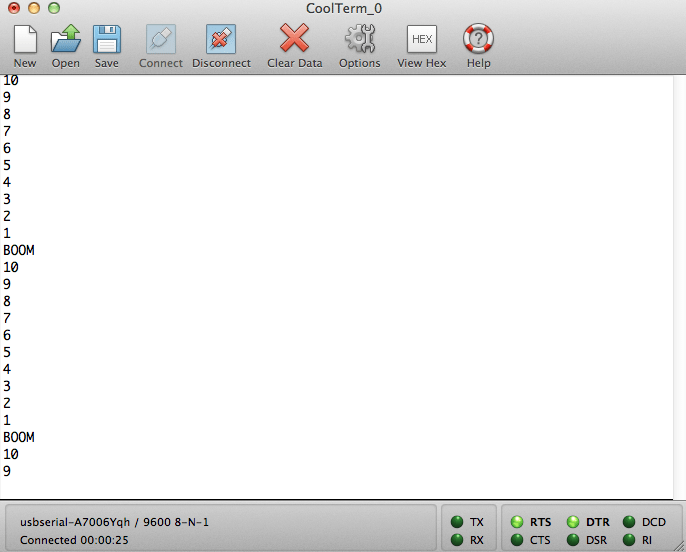
Here is what the output looks like on CoolTerm, a serial monitor that I use on my Mac:

Having a “printf” function is very handy for debugging your projects – so choose a chip that will let you support this functionality without too much pain.
Downloads
Here is all the code used in this project – do pay attention to the flags in the Makefile.


