
<p style=”padding: 20px;”
 </p>
</p>
Like many folks, I got introduced to microcontrollers through the Arduino platform. The ease of setup, simple language syntax and the availability of a huge number libraries makes Arduino a very attractive choice to prototype your hardware projects. But after you get a grip on your project, sometimes it's worth asking if you really need the power and the prototyping ergonomics of an Arduino, especially if all you are doing is reading a few sensors and turning on a few LEDs.
Atmel has a line of microcontrollers called tinyAVR which are little microcontrollers which can do a lot of the work that an Arduino does in a much more compact form. Take a look at the wikipedia page that compares the capabilities of the tinyAVRs.
In this post, I'll be setting up to program an Atmel ATtiny84, a chip that I will be using for most of my ATtiny projects. I picked this 14-pin chip rather than the very popular 8-pin ATtiny85 because the former has a few more I/O pins which could come in handy for many projects. Here is a pin comparison between these 2 chips.
[From Atmel datasheets, for illustrative purpose.]

I will be programming the ATtiny85 in C, using the free AVR-GCC and AVRDUDE tools. Windows users please read the Adafruit guide to set up the AVR tools. Mac users (like me, for instance) can use the free CrossPack suite for AVR programming.
Next, you need a programmer. I recommend the Sparkfun Pocket AVR programmer, which I use.
The setup is really simple - just connect the VCC, MISO, MOSI, SCK, RESET, and GND pins from the chip to the same pins on the programmer. The ugly looking small PCB you see below is my homemade version of the Sparkfun AVR programming adapter - not a requirement, it just makes it convenient to connect the 6-pin plug easily to a breadboard.
Note that you need not connect the VCC pin to the programmer, if you are powering the circuit yourself. There is a small switch on the programmer in case you decide to go that route.
Here is my programming setup:

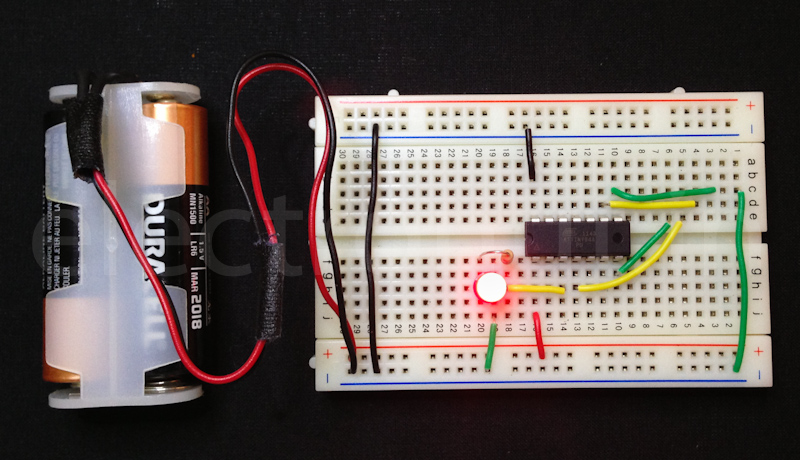
Once you program the chip, you don't need the programmer, and here you can see the chip working directly from the 3V battery:
Here is the source code - very simple:
Here is the Makefile:
To upload the program to your chip, connect the programmer to the USB port of your computer, and run 'make install' in a shell in the relevant project directory. If all goes well, you will see a happy blinking LED.
So now you know how to program an ATtiny84. But to really understand the chip, you have to read the Atmel datasheet (just search for 'ATtiny84 datasheet' on the net) - there is no way around it. It's complex and can seem incomprehensible in the beginning, but do persist, and in the end, I assure you that it will be much more rewarding than blindly using libraries that someone else wrote.
Good luck to you in starting out with the tinyAVRs, and watch electronut.in for upcoming projects that use these chips.